Sunday, December 11, 2016

Gemma's Crochet Scarf

Looking for a Christmas present, just found one lol, a scarf name after my Sister <3

This is an easy scarf to make, not that hard, although the picture shows but I assure you even beginners can do it.

This is in US terms and I also included the stitches used. Hope you enjoy making this scarf

This is a simple stitch for making scarf, cowl,blanket or any possibilities that you can make,
 just add chain.


Materials:
  • 4.5mm hook
  • 8ply yarn or  your own choice ( I used light pink )
  • Scissor
  • Yarn needle

Stitches used:
  • Single crochet (sc)
  • Double crochet (dc)
  • V-stitch ( DC, ch2, DC )
  • Cluster - dc3tog ( double crochet three together decrease)

To begin:
Ch26, sc 2nd chain from hook

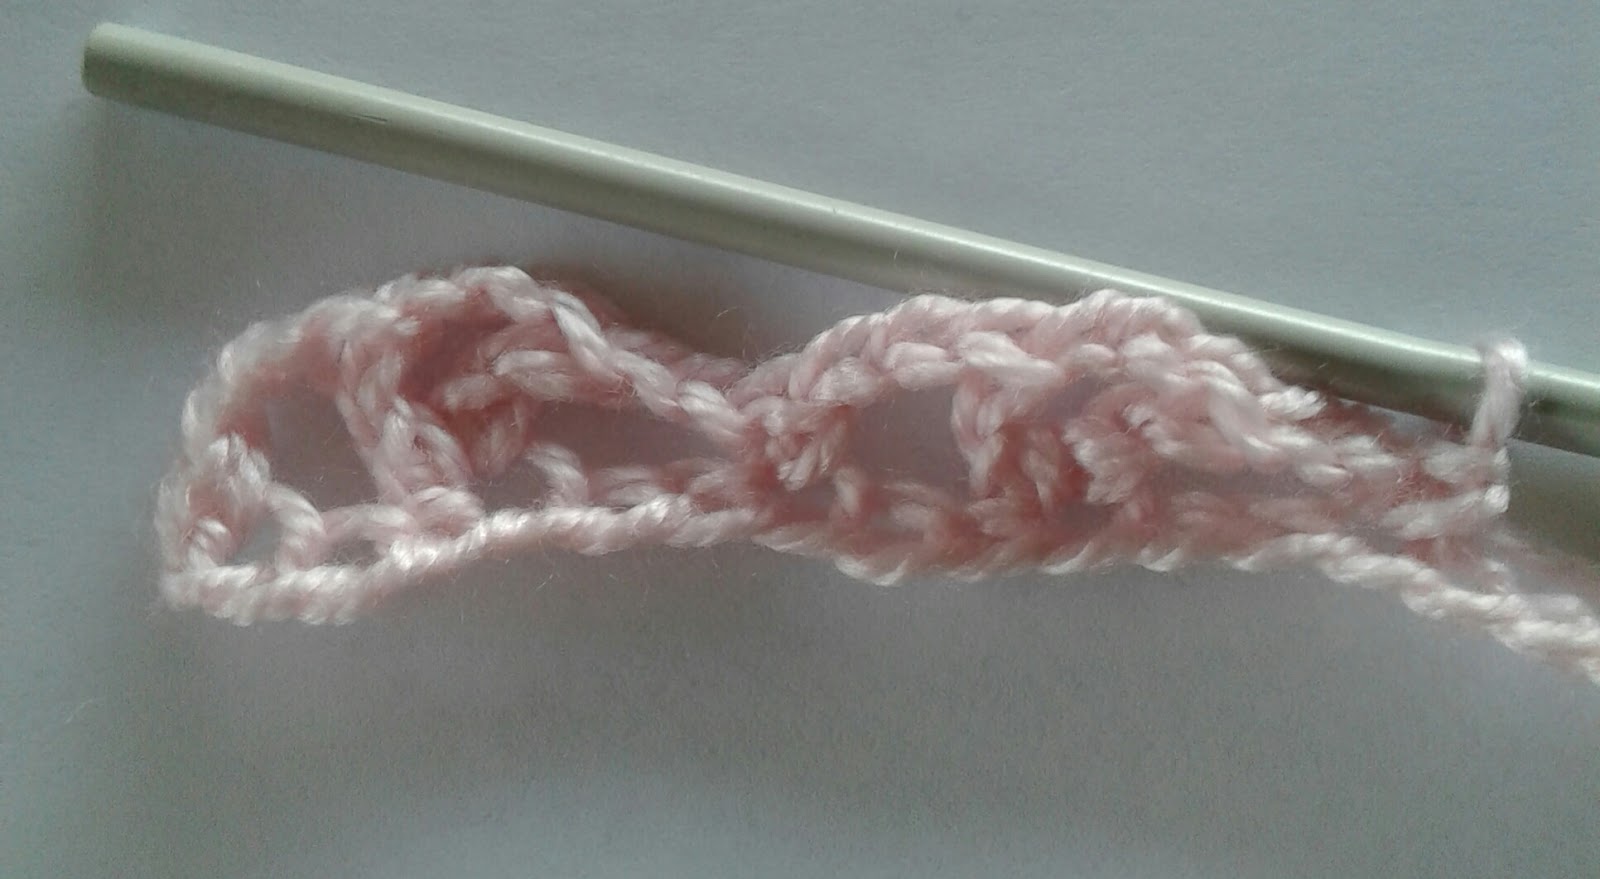
Row 1:  *Ch2, skip 2sts, work ( 1dc, ch2, 1dc ) v-stitch made
               Ch2, skip 2sts, sc next st, ch2 repeat from*
               Ch2, skip 2sts, sc last st ( 4 v-stitch made)


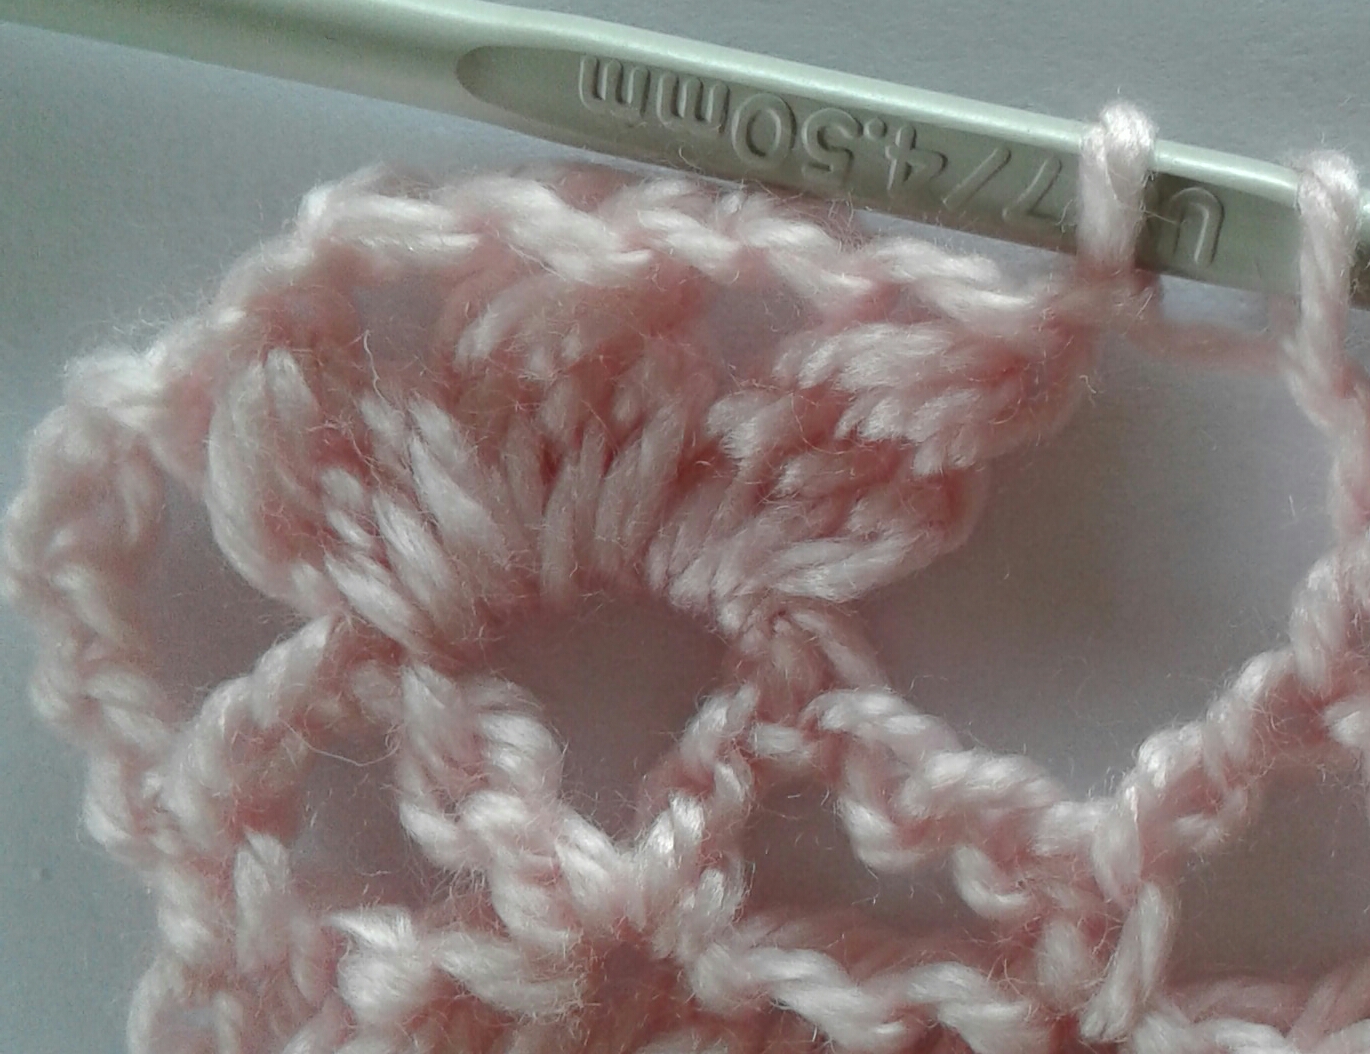
Row 2: Ch4, *work (cluster, ch2, cluster,ch2,cluster ) 
             3 clusters made into the v-stitch of previous row
             Ch1, repeat from* to end. Ch1, skip 2sts, dc last chain.


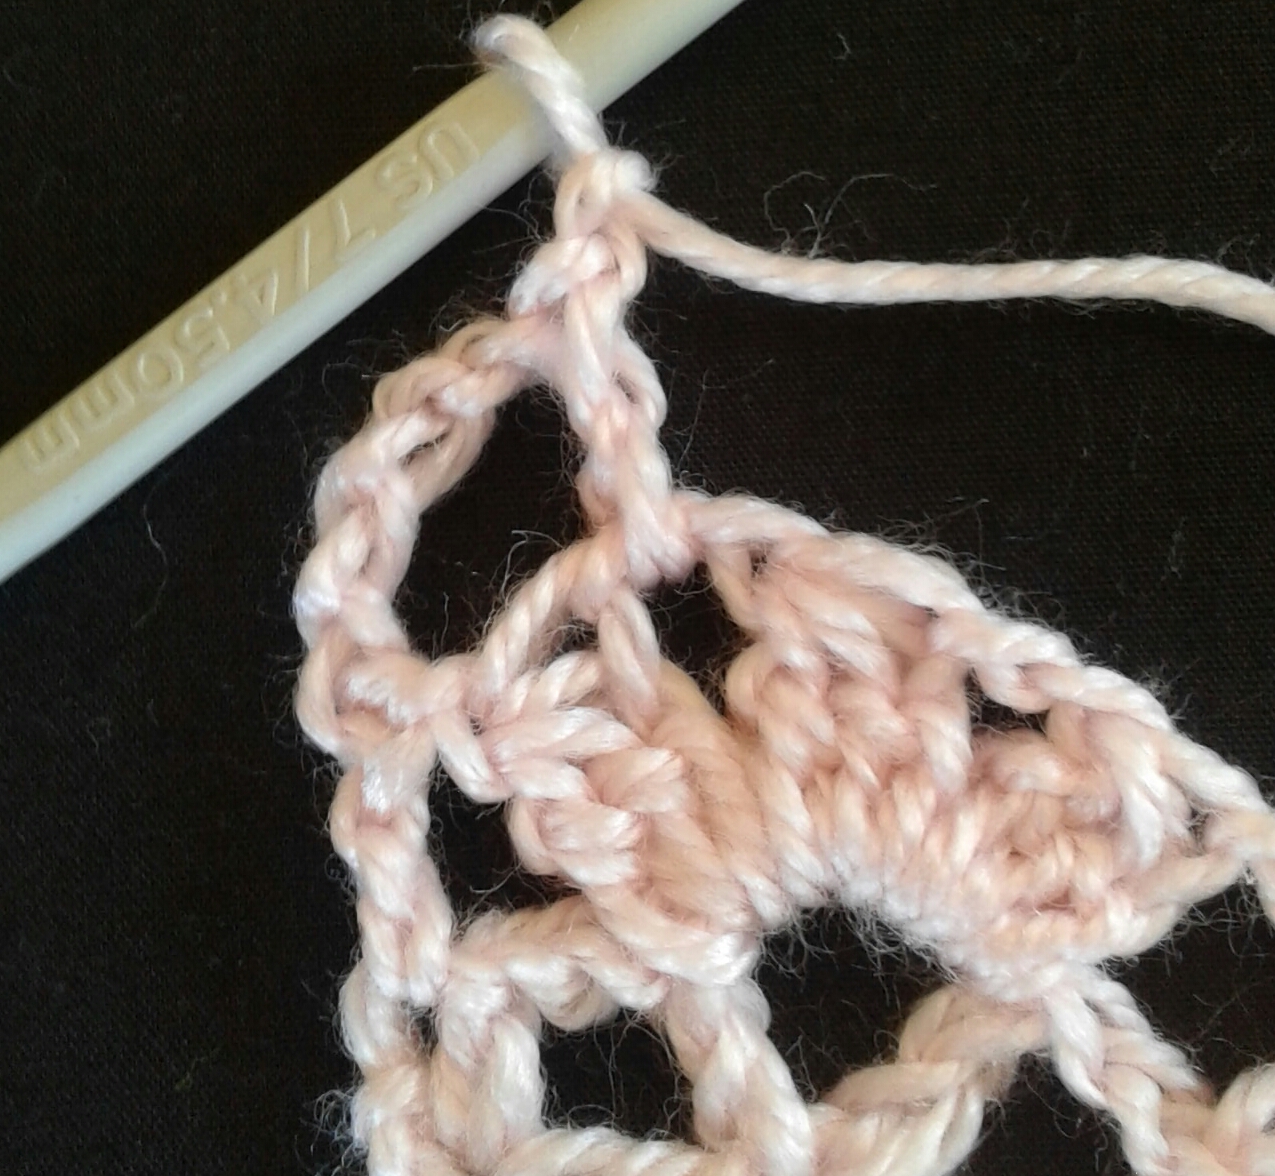
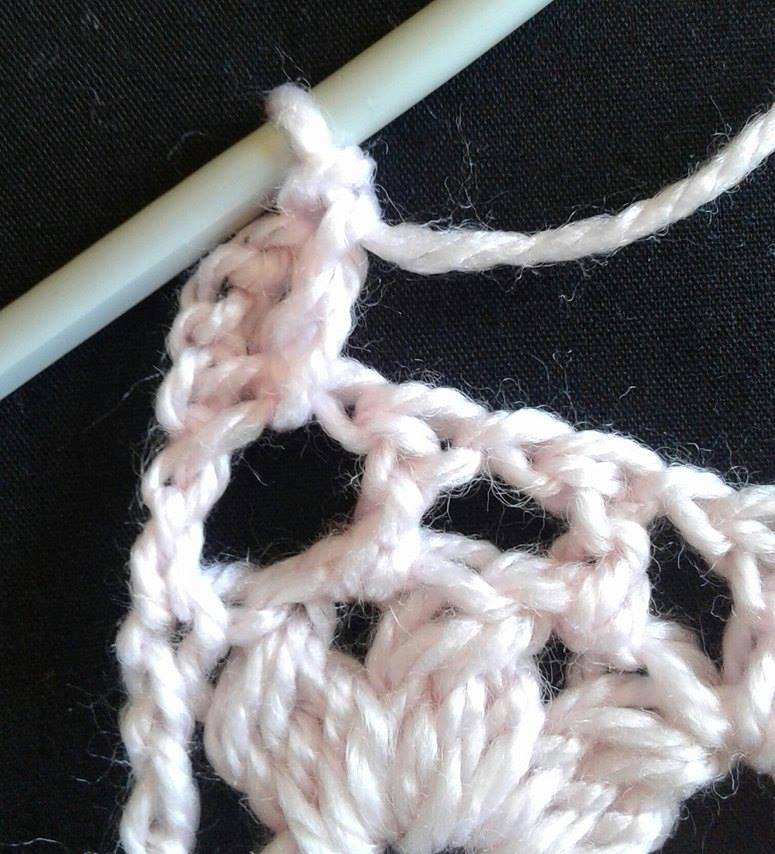
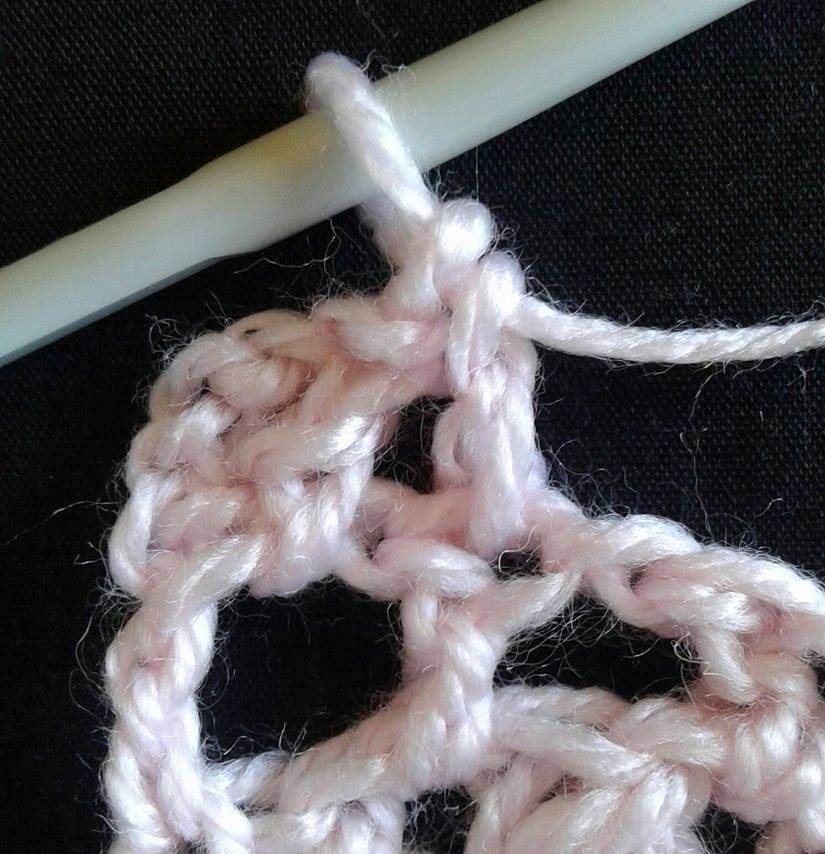
Row 3: ch4 *dc to the ch2 of cluster just made
             Ch1, repeat next ch2 cluster. Ch1, DC next ch1 space
             Ch1, repeat from*
             Ending with DC top of ch4 


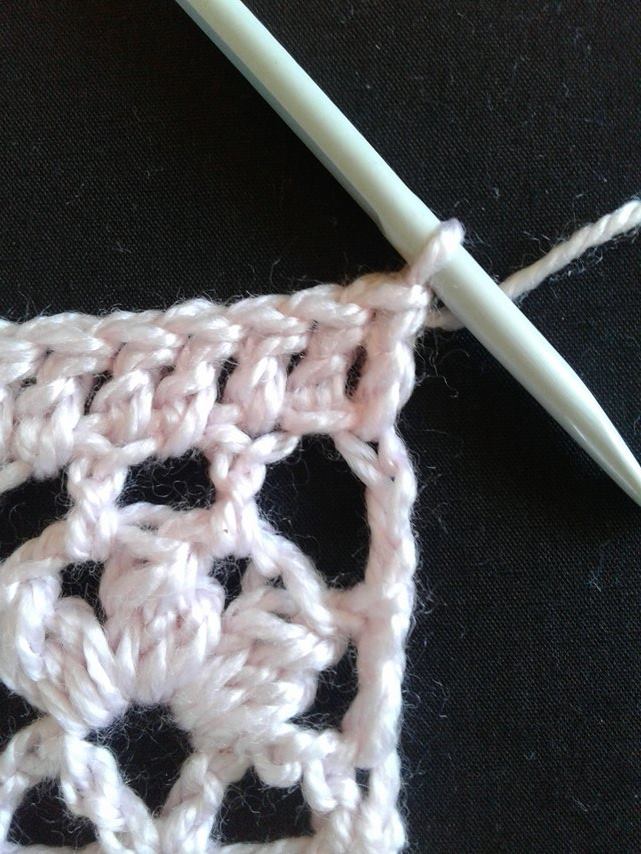
Row 4: ch3 count as first DC
*DC next ch1 space, DC next DC, repeat* until the end.
             Dc 4th chain of ch4 end with dc next st.

15355959_1164652043641708_2147422010_n.jpg15435678_1164652033641709_681839039_n.jpg15416010_1164652120308367_1345267577_n.jpg

Row 5: Ch1, sc same st, ch2, skip 2sts, work ( 1dc, ch2, 1dc ) v-stitch made
            Ch2, skip 2sts, sc next st, ch2 repeat from*
            Ch2, skip 2sts, sc last st ( 4 v-stitch made)

    Repeat from row 2 until you have your desired length of scarf.

    I ended up Row 3.

       Hope you all like it, if you have any question please feel free to ask. 
     Thank you

     If you would like a PDF copy with photo tutorial on it, please visit my Ravelry store. 

    Milina


Saturday, November 5, 2016

Crochet Star Blanket

So proud of myself for making these star blanket for the first time, I thought it was hard but I am wrong in fact its enjoyable to make.

I used 5mm hook and any 8 ply yarn. Begin with magic ring, and work with puff stitch.
Diagram is easy to follow if you know the symbol of crochet.


I am so pleased and happy that a friend of mine who is a first time grandmother of beautiful twins loves it <3


I found a pattern from a pinterest and it's only a diagram and photo, I just work from there and figured it out myself and I am glad it turned out so beautiful.


Chart from Pinterest


Please check my Pinterest for more crochet ideas <3
https://au.pinterest.com/Milescrochet/ 

This is only an idea and inspiration as I don't have the right to write a pattern as this is not my design but I love working on it. 

Thank you for visiting my blog!


Milina


Friday, November 4, 2016

How to join my shell granny square

I know, there are plenty videos on how to join your square, but as for me, I ended with shell stitch, I will show you how to join my square.

It's pretty easy but please bear with me as probably my instructions are not that clear, but hopefully I can justify with some photo tutorial :)

ROW 1:
To start : wrong side, facing together
using 4.5mm hook, same color yarn as your end shell part
insert hook to the 3rd dc of 5dc (Shell part)
ROW 2:
Ch1, sc in every stitch including the sc
between shell until the 2nd dc of 5dc.

Facing right side, insert hook to the 3rd dc of the other square

Pull the yarn
Slip stitch the yarn on your hook to join,
ch1 and work sc all around until the 2nd dc of 5dc (shell part)

When you connect to the middle
Insert hook to the 3rd dc of 5dc


Connect to the side square, sc together
insert hook to the 2nd dc of  5dc next square 
yarn over and slip stitch tightly back to the yarn on your hook
ch1


Repeat row 2


And continue with the other squares :)

Hope you all understand my pattern
If you have problem, please don't hesitate to send me a message <3

Thank you & Happy hooking!!!


Milina


Thursday, November 3, 2016

Shell Granny Square

Hello everyone, I'm here again :)

After finishing some orders, busy with kids as usual :) I came up with something, easy but beautiful pattern and I named it SHELL GRANNY SQUARE.


I was browsing Pinterest and looking for cover for my Coffee table, husband bought it for me, I meant for us lol,  I can't find anything, although there are some beautiful patterns for table runner out there still can't find one.

Anyway, I am a member of one of the crochet group over Facebook and there was a lady posting a beautiful, yummylicious biscuit if I am not mistaken, and it really catches my eyes and decided to turn into a beautiful crochet. I really thank her for posting it <3.


Beautiful isn't it?

If you are familiar with granny square and shell pattern, this will be an easy pattern for you.

For the materials:
5mm hook
any 8 ply yarn (according to your choice)
scissor
yarn needle for weaving ends

To begin with:
Ch5,  join first st. to form a ring


Row 1:  
Into the ring, work ch3 (dc, ch1,dc)
*ch2 (dc,ch1,dc,ch1,dc)
repeat* until you have 4 groups of dc's
ch2, slip stitch top of ch3
Fasten off


Row 2:
Change color, insert yarn and hook in any ch2 space,
(ch4,dc,ch1,dc, ch2, dc,ch1,dc,ch1,dc) same space
*ch2, skip 3dc, dc,ch1,dc,ch1,dc, ch2 , dc,ch1,dc,ch1,dc)
repeat* 
ending with ch2, slip stitch to the top of ch3. (Total of 4 groups)
Fasten off


Row 3:
Change color, insert yarn and hook in between of 3dc's group
(ch4,dc ch1 dc, ch2, dc ch1 dc ch1 dc) same space
*ch2, skip 3dc, dc,ch1,dc,ch1,dc to the ch2 space
ch2, skip 3dc work ( dc,ch1,dc,ch1,dc, ch2, dc,ch1,dc,ch1,dc) 
into ch2 space (middle of the 3dc's group) repeat* all around
ending with ch2, slip stitch to the top of ch3. Fasten off


*Note: 
  I am weaving the ends in this part or you can leave it to the end if you like.
  
  When you weave the first row, don't close it to the end.

leave the hole open


Row 4:
For this row, we will do the shell pattern

 
Insert yarn and hook in the ch2 space (middle space of the 3dc's group)
 ch3, work 4dc same space, 
 sc in the 2nd dc of 3dc. 
 5dc to the ch2 space
 sc in the 2nd dc of 3dc
 *5dc to the ch2 space 
 sc in the 2nd dc of 3dc
 repeat* all around
including the 3dc's group.


ending with sc in the 2nd dc of 3dc, slip stitch to the top of ch3.
Fasten off, weave ends and you're done!


You can make as many as you want, that's what  I am doing for my coffee table, I will post my finished cover when done.

Hope you all like my pattern, if you find some mistake, please let me know and I am happy to fix it. :)
 

Happy hooking!!!


MILINA


Wednesday, September 14, 2016

Crochet C2C Hello Kitty Cushion


While searching on Pinterest, I came across with this Perler Bead Pattern by Kandi, and found this cute Hello Kitty picture graph. And I decided to make a cushion out of it using c2c crochet.
16 rows down and 18 rows horizontal.

The size of my cushion are 15inch width and 13 inch length.


                                         You can search some other pins in my Pinterest.


The  materials I used, 5mm hook, 8ply knitting yarn ( brand name) with my  choice of colours
Pink, black, yellow, white and purple for the edging and the back. Stuffing from my old pillow :)


 For my weaving, I choose the front and put all excess yarn to the back of your cushion using yarn needle and work from there, I just tied it up and cut the yarn.


For the back, using purple colour, I made another c2c same size as the front and I sew it together using sc stitch.


For the edging I used shell pattern

In the end of sewing the cushion,

Ch1, count as sc, *skip 1sc, 4dc next st., skip next st., ss to the next stitch, repeat * all around. Fasten off and you're Done!

Hope you all like it, If you do, I want to see your creations of c2c also :)

Happy Hooking!!!

Milina


Crochet c2c Ideas and Inspiration

After I taught myself on how to crochet c2c or crochet corner to corner, I found myself making it so often now, so easy to learn and most of all you will enjoy it.

Here is a guide and inspiration to you all, I will posted link on my finished c2c.

Here is a link from 1doogwoof on how to crochet c2c
http://www.1dogwoof.com/learn-c2c-crochet/

 My first c2c done is one of the Zoodiacs of 1dogwoof, I love how it turned out and not bad for the first time :)
You can find all her collections here

The second c2c I made is for my son as he likes bird, 
found the picture graph on Pinterest 
 and I have heaps save and pin if you want to check it out 

There's a lot ways to learn c2c and if you do, you will not stop yourself doing it :)

I hope you find it helpful

Thank you for visiting


MILINA
 

Monday, September 5, 2016

Crochet tablet/Ipad sling bag2


Another crochet Tablet/Ipad with sling done and dusted.


A massive thank you to everyone who downloaded my first crochet tablet/Ipad sling bag.

For this bag, I used shell stitch, love how it turned out, looks like a star stitch to me :)

This is for 7inch tablet/Ipad but you can make it bigger, by adding chain.

I did test it on two different devices, the light and a little bit heavy but all good. 
Can be use as purse or handbag as well.


For the shell pattern, 
which is the body of the bag

All you need are:
Your choice of yarn
I used a yarn name called knitting yarn 
100% acrylic but soft 8 ply

4.5mm hook for sewing the sides
5mm hook
scissor
yarn needle
all in US term
button

 Using 5mm hook, 
make a number of chain multiple by 6 plus 4 extra turning

Chain 36 plus 4


Row 1:   
Work 2dc into 4th chain from hook, 
*skip 2sts, 1sc into next chain, skip 2 sts, 
5dc next chain, repeat from* to the end.
after sc, with the remaining 3sts, skip 2sts
3dc into last chain. turn 


Row 2:            
 Ch1 to count as first sc, 
*skip 2sts, 5dc into sc,
         skip 2 sts, sc to the next chain (3rd st in shell part),
repeat from* to end. 
Work  sc into 3rd chain of chain 3.Turn


Row 3:             
 Ch3 to count as first dc, 2dc same st. 
*1sc into the 3rd dc of 5dc (shell part) skip 2 sts,
5dc next sc, repeat from* to end,
after the sc into the 3rd dc of 5dc (shell part) skip 2 sts, 
work 3dc into last sc. 


Repeat from row 2 until you have 32 rows or if you happy with your length.

 
Measure to your tablet or Ipad and fold, 
make sure your row 32 will be your front
place a  marker  and start sewing both sides 
by using 4.5mm hook.

Just a note when sew both sides, 
work 1sc in sc space and 2sc in ch3 space.
Fasten off and weave ends.

For the strap:
ch150 or more,
ch1 and work hdc across
sew to the bag and sew the button too
and you're Done!


If you find some errors or if you have a question 
please let me know.
You can sell your finished product and  
you are all welcome to post it in my facebook page.
Thank you for visiting

If you would like a PDF copy please visit my Ravelry Store

Enjoy!!

MILINA


Thursday, July 28, 2016

My simple spring wreath


Hello everyone, its me again, after the long school holiday, im back :)
spring is around the corner , I thought I would make something colourful with flowers on it and I represent my simple spring wreath or could be a wall art for your bedroom, lounge or anywhere.

This is a simple thing to do, only you must have patience in sewing the flowers onto the ring.

All you need are:
5mm hook 
4.5mm hook
Variety of yarns, depending on your color choice with a 8ply
scissor
yarn needle
thread needle
different kinds of buttons

Ring gal (250mm)
I cant find a foam, so I decided to try this wire :)

work sc around the ring

until you cant see much the ring, doesnt matter, flowers will cover it anyway.
work sc for making the loop to hang your wreath.

FOR THE FLOWERS DECORATION:

I used a two simple flower pattern, dont make rose as its not good, heavy for your ring.
There are beautiful flowers in Pinterest if you would like to search or you can use my example flower pattern.

Magic ring, ch2
9dc into the ring and join with slip stitch
*ch3, (3tr same st, ch3) 
sl st next st, sc next st, repeat* until you have 5 petals
slip stitch to close, and just add some button to your liking.

Hope you all like it.  Enjoy making this simple wreath 

Milina